Did you know you can use C# to control the general-purpose I/O (GPIO) pins on your Raspberry Pi? Learn how to write a .NET app to drive an LED with this tutorial.
Wiring the Circuit
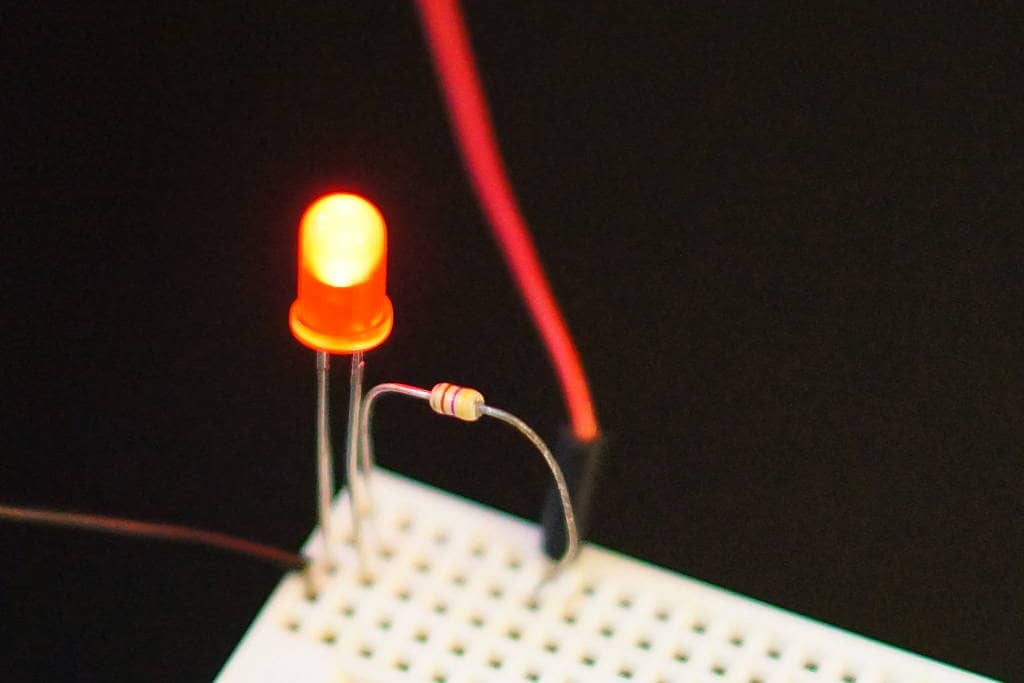
The electronics for this project will consist of a current-limiting resistor connected to a single LED in series. consider the following schematic.

Though it doesn't really matter in this simple circuit, it is good practice to connect the resistor to the anode (+) of the LED. The anode is the long leg of the LED. In my case, I am using a 470Ω resistor. If you use a lower resistance (e.g. 47Ω), your LED will be brighter. If you use a resistor with a larger resistance value (e.g. 1kΩ), your LED will be dimmer. If you don't use a resistor at all, your LED might burn out!
Connect the resistor to a GPIO pin and connect the cathode (-) of the LED to any available ground (GND) pin on your Raspberry Pi. For an overview of a Raspberry Pi's GPIO pins, review the documentation. I am using GPIO24 (pin 18) and ground pin 20.

Making LED Blink with .NET
If you have not already installed .NET on your Raspberry Pi, you will need to do that first. If you have Visual Studio Code installed on your Raspberry Pi, you can write your .NET code directly from there. I will be writing the code on my desktop computer using Visual Studio, and then I will deploy the final project to the Raspberry Pi.
Create a new Console Application targeting .NET 5.0 or later. To interface with I/O pins on your device, you must install the System.Device.Gpio Nuget Package. From the Nuget Package Manager Console, run the following command.
Install-Package System.Device.Gpio
Let's take a moment to walk through the following code. The first thing you might notice is that this program is relying on top-level statements. This is a new feature in C# 9.0 that allows you to omit a lot of boilerplate code in simple console applications and utilities.
using System;
using System.Device.Gpio;
using System.Threading;

int ledPin = 24; //GPIO24 is pin 18 on RPi
int ledOnTime = 1000; //led on time in ms
int ledOffTime = 500; //led off time in ms

using GpioController controller = new();
controller.OpenPin(ledPin, PinMode.Output);

while (true)
{
    controller.Write(ledPin, PinValue.High);
    Thread.Sleep(ledOnTime);

    controller.Write(ledPin, PinValue.Low);
    Thread.Sleep(ledOffTime);
}
Start by importing the requisite namespaces, including System.Device.Gpio. Next, declare some variables that you will use when setting up and using your GpioController. If you are driving your LED through a different pin besides GPIO24, be sure to change the value of the variable ledPin. In this example, the LED will be on for 1 second and off for half a second.
Notice the using keyword when declaring the GpioController variable. A using declaration ensures the compiler properly disposes of the declared variable once the controlling scope ends. Prior to C# 8.0, you would have manually declared the scope for the disposable variable as follows.
using (GpioController controller = new())
{
    ...
}
In our example, since the controller has been declared in an implicit Main() method that consists of an infinite loop, it will never be disposed while the program is running. Let's add some code to make sure make sure to properly dispose of the controller if a user closes the console application using the Ctrl-c keyboard shortcut.
Console.CancelKeyPress += (s, e) =>
{
    controller.Dispose();
};
We already configured the controller to treat ledPin (pin 24) as an output. This will allow our program to drive the value of the pin high or low depending on whether we want the LED to be on or off. The while loop of our .NET app simple drives the pin HIGH to turn the LED on, waits 1000ms, then drives the pin LOW to turn the LED off and waits 500ms. Your final program should look similar to the following.
using System;
using System.Device.Gpio;
using System.Threading;

int ledPin = 24; //GPIO24 is pin 18 on RPi
int ledOnTime = 1000; //led on time in ms
int ledOffTime = 500; //led off time in ms

using GpioController controller = new();
controller.OpenPin(ledPin, PinMode.Output);

Console.CancelKeyPress += (s, e) =>
{
    controller.Dispose();
};

while (true)
{
    controller.Write(ledPin, PinValue.High);
    Thread.Sleep(ledOnTime);

    controller.Write(ledPin, PinValue.Low);
    Thread.Sleep(ledOffTime);
}
You are now ready to publish your program as a self-contained application targeting linux-arm. Once you push the file to your Raspberry Pi and launch it, your LED should begin to blink. If you need help setting up SSH on your Raspberry Pi or configuring publishing options in Visual Studio, see the Visual Studio, SSH, Raspberry Pi tutorial.
The Bottom Line
If your IoT application requires the capabilities of a full computer on a single board instead of a simple microcontroller, a Raspberry Pi is a good option. In this tutorial, you learned how to use the System.Device.Gpio package to interact with GPIO pins on a Raspberry Pi. You connected a simple LED circuit to a Raspberry Pi and wrote a .NET 5 program to make the LED flash. Once you master the fundamentals of building IOT apps for the Raspberry Pi, the possibilities are endless.
Don't stop learning!
There is so much to discover about C#. That's why I am making my favorite tips and tricks available for free. Enter your email address below to become a better .NET developer.
Did you know?

Our beautiful, multi-column C# reference guides contain more than 150 tips and examples to make it even easier to write better code.
Get your cheat sheets