With javascript, you can easily capture an image from a user's webcam. With Blazor, the real power comes when you transfer the image back to your C# code, enabling you to use your favorite C# libaries to work with the image. In this tutorial, we will be using Blazor and ImageSharp to add a caption to images captured from a user's webcam.
Start the webcam
Since this app is working with a user's webcam, I prefer to keep everything client-side for privacy. Lucky for us, a Blazor WebAssembly App satisfies this requirement beautifully. Once your new project is created, add a new file called webcam.js to your project's wwwroot folder. We will add a simple javascript functions that starts the user's webcam. Later, we will invoke this function from our C# code.
function startVideo(src) {
    if (navigator.mediaDevices && navigator.mediaDevices.getUserMedia) {
        navigator.mediaDevices.getUserMedia({ video: true }).then(function (stream) {
            let video = document.getElementById(src);
            if ("srcObject" in video) {
                video.srcObject = stream;
            } else {
                video.src = window.URL.createObjectURL(stream);
            }
            video.onloadedmetadata = function (e) {
                video.play();
            };
            //mirror image
            video.style.webkitTransform = "scaleX(-1)";
            video.style.transform = "scaleX(-1)";
        });
    }
}
Be sure to add a reference to this new file before the closing </body> tag in in wwwroot/index.html:
<script src="webcam.js"></script>
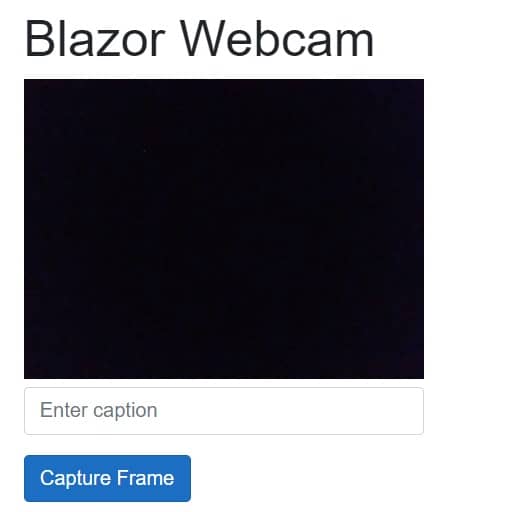
Open Index.razor and add the following HTML elements. This code will add a video feed that will display the user's webcam, and a hidden canvas to store the captured frame. There is also a button that, when clicked, will capture the current frame.
<h1>Blazor Webcam</h1>
<video id="videoFeed" width="320" height="240" /><canvas class="d-none" id="currentFrame" width="320" height="240" /><br />
<button class="btn btn-primary mb-3" @onclick="CaptureFrame">Capture Frame</button> <br />
Now, in the @code section, set a string variable that you can use to store the captured image. Also, we need to start the user's webcam. Go ahead and do this when the page loads by overriding the OnInitializedAsync() method of Index.razor. Invoke the javascript startVideo function you previously wrote, passing in the ID of the video element as a parameter.
@code {
    protected override async Task OnInitializedAsync()
    {
        await JSRuntime.InvokeVoidAsync("startVideo", "videoFeed");
    }
}
Capture Image from Webcam
To capture a frame from the webcam video feed, let's write another javascript function in webcam.js. This function will draw the current frame from the source video to the canvas destination.
function getFrame(src, dest) {
    let video = document.getElementById(src);
    let canvas = document.getElementById(dest);
    canvas.getContext('2d').drawImage(video, 0, 0, 320, 240);
}
Now, we need to call this js function when the Capture Frame button is clicked. Remember, our button is looking for a handler method named CaptureFrame.
private async Task CaptureFrame()
{
    await JSRuntime.InvokeAsync<String>("getFrame", "videoFeed", "currentFrame");
}
Pass Image to C#
If you were working strictly with javascript, you could simply unhide the canvas, display the captured image there, and the project would be finished. But this is a Blazor tutorial, so let's take it a step further. Update the getFrame method in webcam.js to receive a new DotNetObjectReference variable called dotNetHelper. We will use this variable to pass the captured image data string to our C# code through a method called ProcessImage().
function getFrame(src, dest, dotNetHelper) {
    let video = document.getElementById(src);
    let canvas = document.getElementById(dest);
    canvas.getContext('2d').drawImage(video, 0, 0, 320, 240);

    let dataUrl = canvas.toDataURL("image/jpeg");
    dotNetHelper.invokeMethodAsync('ProcessImage', dataUrl);
}
Back in Index.razor, first update the CaptureFrame() method you previously wrote. This time, you will pass the .NET instance to the getFrame() javascript function.
private async Task CaptureFrame()
{
    await JSRuntime.InvokeAsync<String>("getFrame", "videoFeed", "currentFrame", DotNetObjectReference.Create(this));
}
Finally, create an invokable .NET method, called ProcessImage() which should accept the image data string as a parameter.
[JSInvokable]
public void ProcessImage(string imageString)
{
    byte[] imageData = Convert.FromBase64String(imageString);

    //Do image processing here
}
Verify Image in C#
In this example, we will demonstrate that our C# code has successfully received the image by simply displaying the captured image back to the user. In Index.razor, add a string variable to store the URI of the currently captured frame.
private string frameUri;
Next, display an image using the frameUri variable as the image source.
@if (!string.IsNullOrEmpty(frameUri))
{
    <img src="@frameUri" />
}
By updating the ProcessImage() method, we can set the value of frameUri to the base64 image string received by the ProcessImage() method.
[JSInvokable]
public void ProcessImage(string imageString)
{
    frameUri = imageString
}
Process Image using ImageSharp
Recall that the javascript getFrame() function passed a Base64 image string to our ProcessImage() method. By converting imageString to a binary byte array byte[], you will be able to use your favorite image processing library to perform actions on the resulting image.
[JSInvokable]
public void ProcessImage(string imageString)
{
    byte[] imageData = Convert.FromBase64String(imageString.Split(',')[1]);
}
For example, we can add an input field and use ImageSharp to add a caption to the image based on a user's input.
Your complete Index.razor file may look like the following.
@page "/"
@inject IJSRuntime JSRuntime
@inject HttpClient Http
@using SixLabors.ImageSharp
@using SixLabors.ImageSharp.Drawing
@using SixLabors.ImageSharp.Drawing.Processing
@using SixLabors.ImageSharp.Processing;
@using SixLabors.ImageSharp.Formats.Jpeg
@using SixLabors.Fonts
@using System.Net.Http
@using System.IO

<h1>Blazor Webcam</h1>
<video id="videoFeed" width="320" height="240" /><canvas class="d-none" id="currentFrame" width="320" height="240" /><br />
<input class="form-control mb-3" style="width:320px;" type="text" @bind="captionText" placeholder="Enter caption" />
<button class="btn btn-primary mb-3" @onclick="CaptureFrame">Capture Frame</button> <br />
@if (!string.IsNullOrEmpty(frameUri))
{
    <img src="@frameUri" />
}


@code {
    private string captionText;
    private string frameUri;

    FontCollection collection = new FontCollection();
    FontFamily sansFamily;
    Font captionFont;

    protected override async Task OnInitializedAsync()
    {
        await JSRuntime.InvokeVoidAsync("startVideo", "videoFeed");

        //Font stored in wwwroot. Fetch it as byte array, and use it
        var fontBytes = await Http.GetByteArrayAsync("OpenSans-Regular.ttf");
        collection.Install(new MemoryStream(fontBytes));
        collection.TryFind("Open Sans", out sansFamily);
        captionFont = sansFamily.CreateFont(16, FontStyle.Regular);
    }

    private async Task CaptureFrame()
    {
        await JSRuntime.InvokeAsync<String>("getFrame", "videoFeed", "currentFrame", DotNetObjectReference.Create(this));
    }


    [JSInvokable]
    public void ProcessImage(string imageString)
    {
        byte[] imageData = Convert.FromBase64String(imageString.Split(',')[1]);

        //Do image processing here

        DrawingOptions alignCenter = new DrawingOptions()
        {
            TextOptions = new TextOptions()
            {
                VerticalAlignment = VerticalAlignment.Center,
                WrapTextWidth = 304, //Image is 320px wide. This will center with 8px margin on left and right
                HorizontalAlignment = HorizontalAlignment.Center
            }
        };

        using (var image = Image.Load(imageData))
        {
            image.Mutate(x => x
                .Flip(FlipMode.Horizontal) //To match mirrored webcam image
                .Fill(Color.ParseHex("0008"), new RectangularPolygon(0,220, 320, 20)) //Set footer bar for caption
                .DrawText(alignCenter, captionText, captionFont, Color.White, new PointF(8, 230)) //center in footer bar)
            );
            frameUri = image.ToBase64String(JpegFormat.Instance);
        }
    }
}
Note: To draw text using ImageSharp and the SixLabors.Fonts package, I added a .ttf font file to wwwroot. Since this is a web app, I can not simply reference this file directly. Instead, I created an HTTP request to get the file as a binary byte array.
var fontBytes = await Http.GetByteArrayAsync("OpenSans-Regular.ttf");
collection.Install(new MemoryStream(fontBytes));
collection.TryFind("Open Sans", out sansFamily);
captionFont = sansFamily.CreateFont(16, FontStyle.Regular);
Below, you can see the resulting image with the caption.

The Bottom Line
Complete code for this demo is available on GitHub. In this tutorial, you learned how to activate a user's webcam using Blazor and javascript. You then learned how to pass a frame from the video stream to your C# code. Once there, you were able to work with the image using your favorite C# libraries. This example demonstrated how to use a font file with ImageSharp in Blazor and add a caption to an image grabbed from a webcam.
Don't stop learning!
There is so much to discover about C#. That's why I am making my favorite tips and tricks available for free. Enter your email address below to become a better .NET developer.
Did you know?

Our beautiful, multi-column C# reference guides contain more than 150 tips and examples to make it even easier to write better code.
Get your cheat sheets