A servo motor is an essential component in robotics applications. Possible applications include rotating levers and pulling strings (for example, opening a door, steering a car, turning a boat rudder, etc). With a Meadow microcontroller board, you can control a servo using C# in a .NET application.
Testing the Electronics
A servo is controlled using a pulse-width modulation (PWM) signal, so you only need a single GPIO port available on your microcontroller. In this tutorial, you will power and operate an SG-90 servo motor using three wires (+3.3V, GND, and a PWM signal).
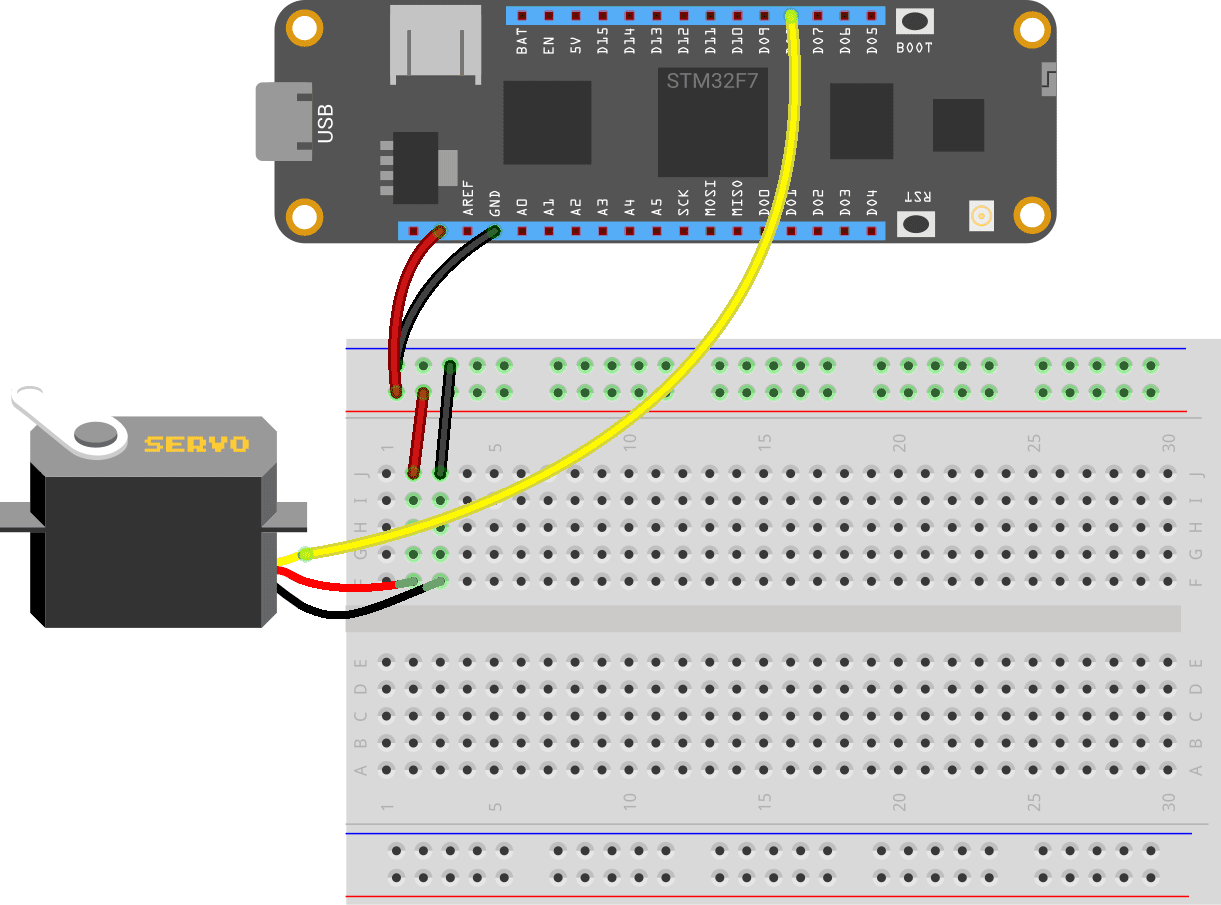
As you can see, I have connected the data pin of the servo motor to pin D08. If you use a different pin, you will need to make the appropriate adjustments in your code in Visual Studio. Virtually all of Meadow's digital output pins support PWM.
In Visual Studio, create a new Meadow Application. Start by installing the Meadow.Foundation.Servo Nuget package.
Install-Package Meadow.Foundation.Servo
In MeadowApp.cs, create and call an Initialize() method to initialize your servo motor hardware.
Servo servo;

public MeadowApp()
{
    Initialize();
}

void Initialize()
{
    servo = new Servo(
        Device.CreatePwmPort(Device.Pins.D08), NamedServoConfigs.SG90);
}
To verify the circuit is properly wired and that your motor functions properly, add a new method called ServoTest() to rotate the servo on startup.
void ServoTest()
{
    servo.RotateTo(180);
    Thread.Sleep(1000);
    servo.RotateTo(0);
}
The SG90 motor can rotate approximately 180 degrees. This method will test the motor by rotating it to 180 degrees, pausing, and then rotating back to an initial position of 0 degrees. The PWM controls are operating behind-the-scenes. Invoke the method from within MeadowApp() after you call the Initialize() method.
public MeadowApp()
{
    Initialize();
    ServoTest();
}
Ensure the Meadow is connected to your computer and the correct COM port is selected (View > Other Windows > Meadow). When you build and deploy, your motor should initialize and run the test pattern.
Adding a Push Button
While the above application is somewhat interesting, it is fairly trivial and impractical. The motor will only move once when the board is powered up. In a real application, you will likely want your motor to respond to certain events, like a press of a button. In this step, you will add a pushbutton to the circuit and engage the motor when the button is pressed.
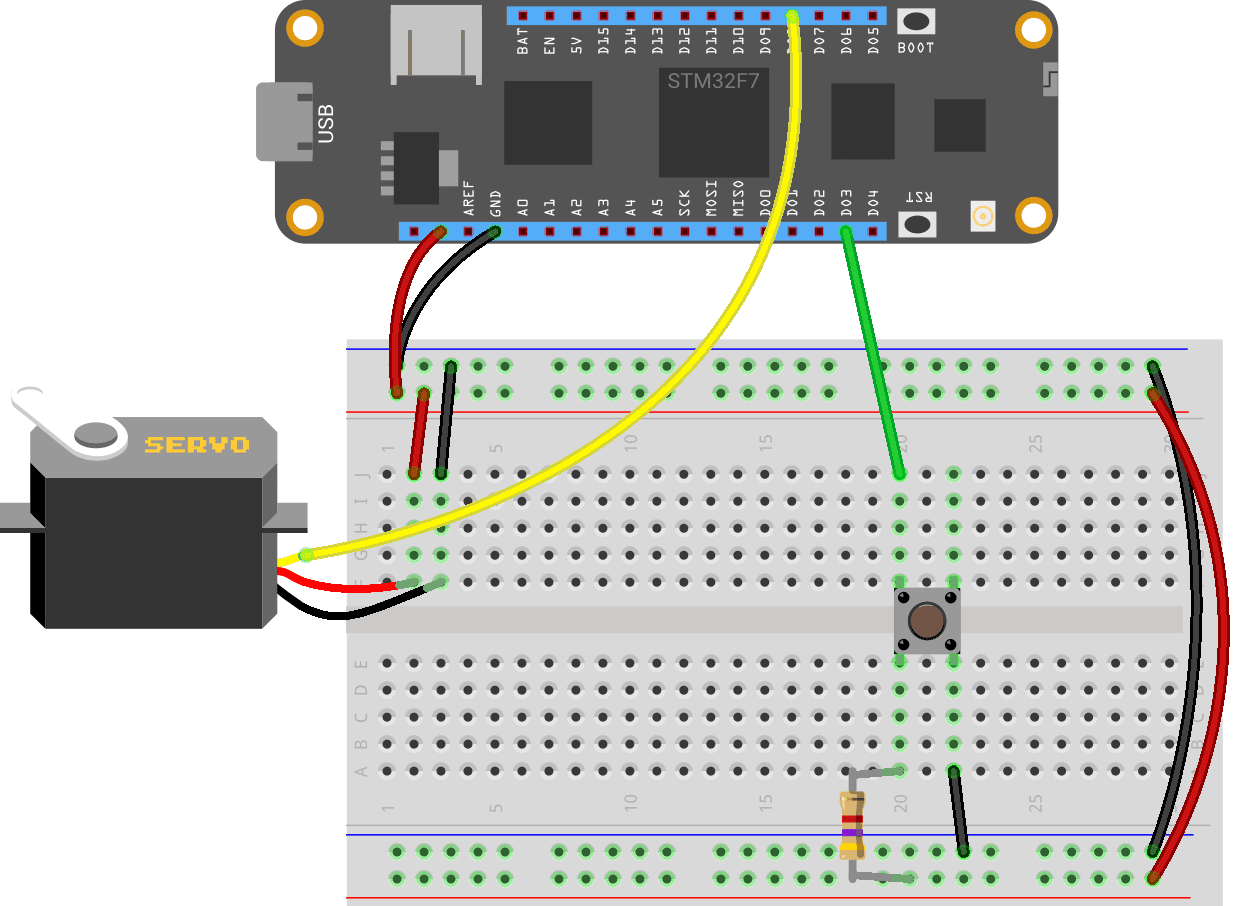
I have a pushbutton connected to pin D03 on the Meadow board. I am using an external pull-up resistor for this switch. In other words, the signal on D03 will be high unless the button is pressed. While the button is pressed, the signal will be driven low (current will pass through the black wire to the ground rail instead of through the resistor to the VCC rail).
Initializing a pushbutton is easy in a Meadow application. In your .NET code, add a global PushButton object.
PushButton button;
Then, configure the button by adding the following line to your Initialize() method.
button = new PushButton(Device, Device.Pins.D03, Meadow.Hardware.ResistorMode.ExternalPullUp);
If you are using a different I/O pin or you have your switch wired up differently, be sure to make the appropriate changes.
Now, instead of calling the ServoTest() method on startup, we will invoke it when the push button is pressed. Still in the Initialize() method, add an event handler to the button's Clicked event.
button.Clicked += ButtonClicked;
The ability to use event handlers, like you are used to doing with C#, is a great feature of the Meadow board. On other systems, you would have to constantly poll the state of the digital input pin in an infinite loop to determine if the button has been pressed. The ButtonClicked() handler will simply call the ServoTest() method we wrote previously. Of course, in more involved projects, you could do more here.
private void ButtonClicked(object sender, EventArgs e)
{
    ServoTest();
}
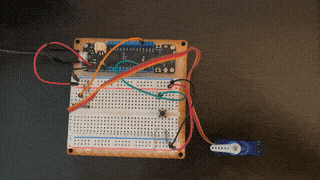
The Final Product
In this tutorial, you learned a technique for integrating a servo motor into your electronics project using a Meadow F7 microcontroller board. Working with a pushbutton, you also learned how Meadow allows you to register a handler method to a physical button's click event, much like you would for a button in a desktop or web application.
Your final project code may look like the following.
using Meadow;
using Meadow.Devices;
using Meadow.Foundation.Sensors.Buttons;
using Meadow.Foundation.Servos;
using System;
using System.Threading;

namespace MeadowServo
{
    public class MeadowApp : App<F7Micro, MeadowApp>
    {
        Servo servo;
        PushButton button;

        public MeadowApp()
        {
            Initialize();
        }

        void Initialize()
        {
            servo = new Servo(
                Device.CreatePwmPort(Device.Pins.D08), NamedServoConfigs.SG90);
            servo.RotateTo(0);
            button = new PushButton(Device, Device.Pins.D03, Meadow.Hardware.ResistorMode.ExternalPullUp);
            button.Clicked += ButtonClicked;
        }

        private void ButtonClicked(object sender, EventArgs e)
        {
            ServoTest();
        }

        void ServoTest()
        {
            servo.RotateTo(180);
            Thread.Sleep(1000);
            servo.RotateTo(0);
        }
    }
}
Don't stop learning!
There is so much to discover about C#. That's why I am making my favorite tips and tricks available for free. Enter your email address below to become a better .NET developer.
Did you know?

Our beautiful, multi-column C# reference guides contain more than 150 tips and examples to make it even easier to write better code.
Get your cheat sheets